

How to Inspect a Used Car Like a Professional
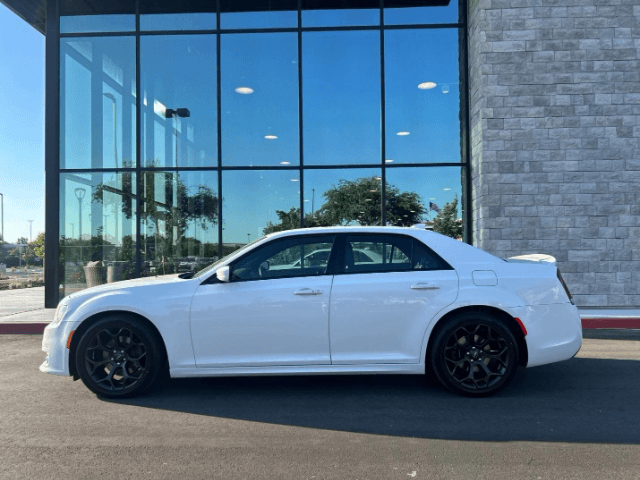
Buying a used car is one of the bigger financial decisions most people make, yet many buyers skip the most important step of all: a thorough inspection. Knowing what to look for can save you thousands in unexpected repairs and give you genuine confidence before signing anything. T & D Auto Group is committed to transparency, and this guide walks you through the full inspection process.
Key Takeaways
- Always inspect in good daylight and on a dry day.
- Check all fluids, belts, and hoses before starting the engine.
- Uneven tire wear, misaligned panels, and rust are serious red flags.
- A professional pre-purchase inspection costs $100 to $200 and is worth every cent.
- Always verify the VIN and check for open recalls before buying.
Prepare Before You Arrive
A strong inspection begins well before you step foot near the vehicle. Start by reviewing the dealership or seller's inventory to compare similar makes, models, mileage, pricing, and available features. This gives you a better understanding of the local market and helps you identify whether the vehicle you're considering is fairly priced. Once you've shortlisted a vehicle, gather a few basic supplies: a flashlight, a clean rag or paper towel, and a notepad. Schedule the visit for daylight hours during dry weather. Floodlighting and rain can make vehicles look shinier than they are, and both can conceal surface defects that would be obvious in natural light. Before you even arrive, use the vehicle's VIN to check for outstanding safety recalls. According to the National Highway Traffic Safety Administration (NHTSA), in 2025 alone there were 997 recalls covering more than 29 million vehicles in the United States. An open recall can affect both the safety and the value of a vehicle, so confirming this before you commit is a critical first step. You should also pull a vehicle history report. These reports reveal prior accidents, title status, service history, and ownership records. They are an essential baseline but do not replace a physical inspection.
Step 1: Exterior Walkthrough
Walk slowly around the entire vehicle and look at every panel in sequence. This is not the moment to rush. Here is what to look for:
- Body Panels: Uneven panel gaps or misaligned doors, hood, and trunk lid suggest past accident damage. Gaps should be consistent on both sides of the car.
- Paint Condition: Look down the length of each panel from a low angle. Waves, ripples, or slight color differences between panels indicate that the bodywork has been repaired. Spray paint residue around rubber seals or trim pieces is another tell.
- Rust: Surface rust on older vehicles is sometimes acceptable, but structural rust around door sills, wheel arches, or underneath the vehicle is a serious concern. Press any suspicious areas gently. A solid thud is good. A crunch or crumbling sound means walk away.
- Tires: Check all four tires, plus the spare. Uneven tread wear across the width of a tire signals suspension or alignment issues. If different brands appear on the same axle, ask why.
An accident can reduce a vehicle's value by anywhere from 10 to 50 percent depending on the severity of the damage. Identifying signs of prior collisions protects both your safety and your investment.
Step 2: Under the Hood
Ask the seller to refrain from driving the vehicle for at least an hour before your inspection. A cold engine is far easier to evaluate than one that has just been run. Open the hood and work methodically through the following:
- Engine Oil: Pull the dipstick. Oil should be dark brown or black. If it appears gray, foamy, or has water droplets on it, this could indicate a blown head gasket or a cracked engine block, both of which are serious and expensive to fix.
- Transmission Fluid: Check this with the engine warmed up and running. It should be pinkish in color and smell like oil. Brown fluid or a burnt odor signals that the transmission has been neglected or is deteriorating.
- Coolant: The coolant in the plastic reservoir should be bright green or orange. Milky or rusty coolant indicates contamination, often the result of a failing head gasket.
- Belts and Hoses: Squeeze the rubber hoses. They should be firm and pliable, not rock hard or cracked. Inspect drive belts for fraying. Replacing these is less costly when done proactively than when they fail on the road.
- Battery: Look for corrosion around the terminals. A green or white powdery buildup is a sign the battery has been under stress. Ask when it was last replaced.
Step 3: Interior Inspection
Take your time inside the vehicle. Sit in every seat, including the rear. Here is what requires attention:
- Smell: A musty or mildewy odor under the seats or in the trunk indicates possible water intrusion or flood damage. A strong air freshener fragrance can sometimes be used to mask this, so lift the floor mats and feel the carpet.
- Dashboard Warning Lights: Turn the ignition without starting the engine. The check engine light and all other warning indicators should illuminate briefly, then go off when the engine starts. A warning light that stays on signals an unresolved issue.
- All Controls and Electronics: Test every switch, button, and dial. Check the air conditioning, heating, power windows, mirrors, infotainment system, backup camera, and all seat adjustments. Problems with electronics are often expensive to diagnose and repair.
- Seat Belts and Upholstery: Pull every seat belt fully to check it extends and retracts smoothly. Look at the upholstery for damage, staining, or excessive wear that doesn't match the stated mileage.
The pedal wear can also reveal the true use history of a vehicle. Brake and accelerator pedals on a genuinely low-mileage car should show minimal wear. If the rubber is worn through in spots, the actual mileage may be higher than shown.
Step 4: Under the Vehicle
Use a flashlight or your phone's camera to check under the vehicle. This is one of the most revealing areas and also one of the most commonly skipped by buyers. Look for the following:
- Fluid puddles or drips directly beneath the engine or transmission. Fresh oil, coolant (often green or orange), or red transmission fluid are all serious warnings.
- Structural rust around the frame, cross members, or floor pans. Surface rust is common on older vehicles, but holes or heavily compromised metal are unsafe and costly to repair.
- Shock absorbers and struts: Greasy or wet tubes indicate blown seals. Push down firmly on each corner of the vehicle. One bounce then settle is healthy. Continuing to bounce indicates worn dampers that need replacement.
- Constant velocity joint boots: These black rubber boots at the ends of the axle shafts should be intact. Cracked or split boots mean the joints may have been running dry and could fail soon.
Step 5: The Test Drive
The test drive is where the car tells its own story. Include a range of conditions: slower city streets, a section of highway, and ideally a stretch of road with some irregularities in the surface to evaluate the suspension. Pay close attention to:
- Acceleration and Transmission Shifts: Power delivery should feel smooth and consistent. Hesitation, clunking, or hard gear changes are warning signs.
- Braking: Apply the brakes firmly at various speeds. The car should stop in a straight line without pulsation, squealing, or pulling to one side. Spongy brake pedal pressure indicates that the braking system needs attention.
- Steering: The steering wheel should be centered when traveling in a straight line. Vibration, wandering, or excessive play in the wheel suggests alignment or suspension issues.
- Noise: Turn off the audio system and listen. Clunks over bumps, ticking from the engine bay, or grinding from the brakes all deserve investigation.
- Warning Lights: Check the dashboard periodically during the drive. Any lights that illuminate and remain on signal active faults.
After the drive, let the vehicle sit for a moment and check for new fluid drips beneath it. Even a small puddle tells a meaningful story.
Step 6: The Professional Pre-Purchase Inspection
Even the most diligent personal inspection has limits. A certified independent mechanic can put the vehicle on a lift, run a diagnostic scan, check brake pad thickness precisely, and evaluate components you simply cannot access from the outside. Consumer Reports recommends budgeting $100 to $150 for this service, and the Progressive used car inspection checklist notes that approaching the purchase with a critical, methodical eye from the start maximizes the value of this final professional review. Do not skip this step simply because the vehicle looks clean or the seller seems trustworthy. The inspection cost is modest compared to what a missed mechanical issue could cost you once you have taken ownership. The TheStreet used car buying guide confirms that used vehicles depreciate much more slowly once the first owner absorbs the initial drop in value, making a well-inspected pre-owned vehicle one of the smartest purchases a consumer can make. When it comes to car safety, the Insurance Institute for Highway Safety provides detailed crash test ratings that are worth reviewing for the specific model you are considering. The vehicle ratings database lets you look up any make and model to see how it performed across all crash test categories. For research on specific models and their known reliability history, the U.S. News & World Report guide to reliable SUVs is a well-maintained resource that covers J.D. Power reliability data across dozens of models, which can help confirm whether a vehicle you are inspecting has a proven track record. Get pre-approved loan for a used car in Fresno before you finalize your purchase decision. For used car buyers wanting a more academic perspective, research published in the Journal on vehicle age, maintenance, and environmental exposure reinforces why detailed pre-purchase checks matter beyond just mechanical performance.
Conclusion
A professional-level inspection does not require a mechanic's certification. It requires patience, a clear checklist, and the willingness to look closely at every area of the vehicle. When you are ready to find a reliable pre-owned vehicle with full transparency, contact us today and let our team guide you through the process.
FAQ:
What should I look for when inspecting a used car?
Check the exterior for rust and panel alignment, fluids under the hood, and all interior electronics and controls.
How much does a pre-purchase inspection cost?
A professional pre-purchase inspection typically costs between $100 and $200 at an independent mechanic.
Should I get a vehicle history report before buying a used car?
Yes. It reveals prior accidents, ownership history, and title status before you commit to a purchase.
How do I check for rust on a used car?
Inspect panel edges, wheel arches, door sills, and the undercarriage using a flashlight in good daylight conditions.
What does uneven tire wear on a used car mean?
It can signal alignment issues, suspension problems, or that the tires were not rotated regularly by the previous owner.
How do I know if a used car has been in an accident?
Look for uneven panel gaps, paint inconsistencies, overspray on rubber seals, and mismatched panel colors.